Archive for the ‘Vblock’ Category

Nexus: %VMS-1-CONN_SSL_NOAUTH: SSL AUTHENTICATION after upgrading Nexus 1000v


16 Jun

After upgrading Nexus 1000V VSM to version 4.2(1)SV2(2.1a) you start recieving ‘%VMS-1-CONN_SSL_NOAUTH1: SSL AUTHENTICATION failure.‘ message in the console every couple minutes:

N1Kv# 2014 Jun 1 18:34:48 N1Kv %VMS-1-CONN_SSL_NOAUTH: SSL AUTHENTICATION failure.
2014 Jun 1 18:37:48 N1Kv %VMS-1-CONN_SSL_NOAUTH1: SSL AUTHENTICATION failure.
2014 Jun 1 18:40:48 N1Kv %VMS-1-CONN_SSL_NOAUTH: SSL AUTHENTICATION failure.
2014 Jun 1 18:43:47 N1Kv %VMS-1-CONN_SSL_NOAUTH1: SSL AUTHENTICATION failure.
2014 Jun 1 18:46:47 N1Kv %VMS-1-CONN_SSL_NOAUTH: SSL AUTHENTICATION failure.

This is expected behavior because of a new feature that was added in Nexus 1000v 4.2(1)SV2(2.1a) version:
vCenter Server Certificate Validation
The Cisco Nexus 1000V VSM can validate the certificate presented by vCenter Server to authenticate it. The certificate may be self-signed or signed by a Certificate Authority (CA). The validation is done each time the VSM connects to the vCenter Server. If the certificate authentication fails, a warning is generated but the connection is not impaired. This is an optional feature.

To get rid of the warning please generate a valid SSL certificate for vCenter server.

Nexus: Pre-upgrade check failed. Return code 0x40930062 (free space in the filesystem is below threshold).


16 Jun

While trying to upgrade Nexus 5000 series switch I ran into following issue:

Pre-upgrade check failed. Return code 0x40930062 (free space in the filesystem is below threshold).

Pre-upgrade check failed. Return code 0x40930062 (free space in the filesystem is below threshold).

Switch has enough free:

Enough free space

Enough free space

Look at install logs to identify where the problem is by typing:
show system internal log install details | include space

show system internal log install details | include space

show system internal log install details | include space

As you can see the problem is because /var/tmp is bellow the threshold.
To identify what is  taking space in /var/tmp type:
show system internal dir /var/tmp (more…)

UCS: Cisco FN – 63812


13 Jun

Cisco has release a field notice FN – 63812 on 4th of June for their servers that are using Seagate hard drives.
According to Cisco some Seagate drives with specific level of firmware might not respond to requests.
There is a list of drives and instructions how to identify these drives. Unfortunately if you have C220 M2 server with integrated controller like LSI 1064E the instruction are not going to work as the drives are not visible in CIMC.

In CIMC there is nothing listed under Storage tab

CIMC/Storage

CIMC/Storage

In CLI you cannot scope to storage adapter as non exists

show storageadapter

show storageadapter

(more…)

UCS: Unable to communicate with Flexible Flash controller


28 May

For all of you who are using Cisco UCS C220 M3 server and Flexible Flash controller with SD card beware that there is a bug in firmware prior to 1.5(3a)

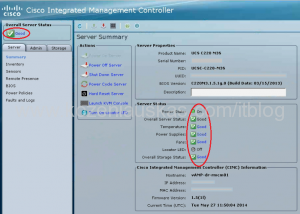
The problem shows up as timeout error for FlexFlash controller. The interesting part is even though there is a problem with the FlexFlash, CIMC still is showing that overall Server Status as good:
Once you log-in into CIMC you will not see that there is a problem:

2

No Errors

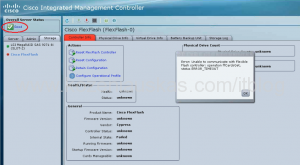
but once you click on Storage tab you’ll get error message:

Error: Unable to communicate with Flexible Flash controller: operation ffCardsGet, status ERROR_TIMEOUT

In the logs you’ll see: (more…)

Cisco Live 2013 in Orlando


30 Jun

So I had a great opportunity to visit Cisco Live 2013 in Orlando.
This was my first(I hope not last) to Cisco Live and I can say it was really impressive.
Everything was big and american style but that is not important. What is important is the things that you can get from this event.
Seeing new products, getting some hands on in the labs and meeting people in the show and talking to techies was really beneficial. The amount of sessions was just huge and I tried to attend as many as possible. This was intensive brain training for 4 days on steroids.
The amount of information that I was receiving each day was mind blowing and I had problems sleeping(probably jet lag also played here)
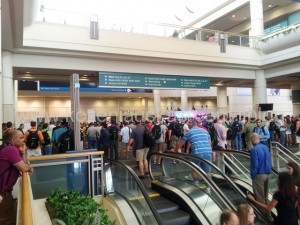
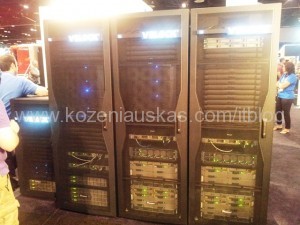
Here are some pictures:
20130624_114543

20130624_160716
Geeks gathering 🙂

20130625_140831
VCE booth

20130625_140911
Vblocks

20130626_161238
One of hundred sessions

Configuring NTP and Timezones on Cisco devices(UCS, MDS, Nexus, Catalyst) in Vblock


21 Jun

Cisco UCS

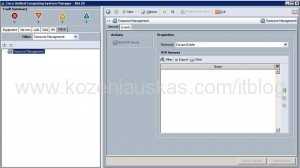
  1. Open UCS manager.
  2. Select Admin tab and change filter to Timezone Management
  3. Select your timezone and click on green + to add NTP server details
    1
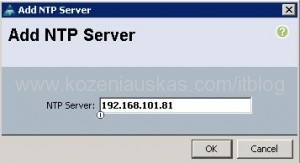
  4. Enter IP address of your NTP server and click OK. You can add FQDN of the server but then make sure that DNS is configured in UCS Manager.
    2

Cisco Nexus 5000 and 7000

  1. Login using CLI to your Nexus switch
  2. To configure your timezone and NTP server details:
    conf t
    clock timezone UTC 0 0
       <== Change your name of timezone from UTC. First 0 is for Hours offset and the second is for minutes offset
    ntp server 192.168.101.81 use-vrf management
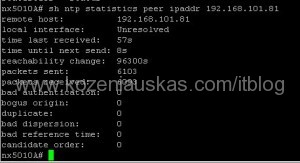
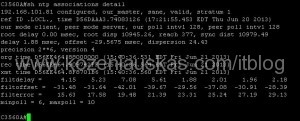
  3. Verify that the configuration was set and packet are being received:sh ntp statistics peer ipaddr 192.168.101.81
    7
    sh clock

Cisco Nexus 1000v and MDS switchesLogin to CLI to your Nexus switch

  1. Login using CLI to your MDS or 1000v switch
  2. Configure timezone and NTP server details:
    conf t
    clock timezone UTC 0 0    
    <== Change your name of timezone from UTC. First 0 is for Hours offset and the second is for minutes offset
    ntp server 192.168.101.81
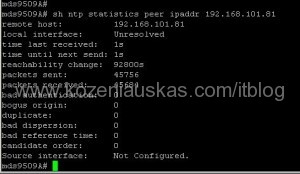
  3. Verify that the configuration was set and packet are being received:sh ntp statistics peer ipaddr 192.168.101.81
    5
    sh clock

Cisco Catalyst switches

  1. Login using CLI to your Catalyst switch
  2. Configure timezone and NTP server details:
    conf t
    clock timezone UTC 0 0    
    <== Change your name of timezone from UTC. First 0 is for Hours offset and the second is for minutes offset
    ntp server 192.168.101.81
  3. Verify that the configuration was set and packet are being received:
    sh ntp status
    4
    sh ntp associations detail
    6
    sh clock

Beware that it may take some time for clock to synchronize on all devices.
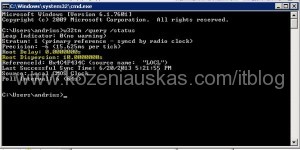
If you are using Microsoft Windows w32tm service for NTP then on your NTP server you need to change LocalClockDispersion to 0 seconds or Cisco devices will not sync.
To check the current setting:

  1. open command prompt on NTP server
  2. type:w32tm /query /status
    8
    By default Dispersion is set to 10 seconds. It cannot be more than 1 second for Cisco devices to sync
  3. Open registry and find the following key
    HKEY_LOCAL_MACHINE\SYSTEM\CurrentControlSet\services\W32Time\Config
  4. Change the value of LocalClockDispersion from a to 0
  5. Restart Windows Time service
  6. The devices should start syncing.

UCS: LDAP nested groups are not working with UCS Manager


19 Jun

So you have your LDAP autentication configured in Cisco UCS manager.
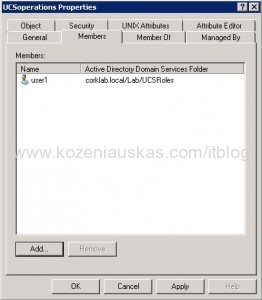
You map group in UCS to LDAP group and add user to this LDAP group
2
Try to login with this user account to UCSM. Everything is working as expected.
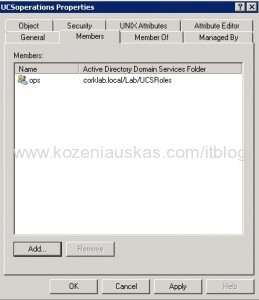
You remove the user from LDAP group add it to another LDAP group and add this Group to LDAP group that is mapped to UCS group(in other words you nest groups).
1
When trying to login again, authentication fails.

This is a known behaviour of UCS and is explained in more detail under bug id CSCtt44185. With UCS, nested groups should not be used, each group in LDAP must be mapped to a group in UCS.

VMware: Cannot create Resource Pool, the option is greyed out


14 Jun

OK this is a now brainer but still get asked sometimes.

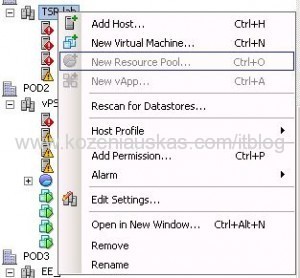
In the vCenter you right click on Cluster and New Resource Pool option is grey out.
1

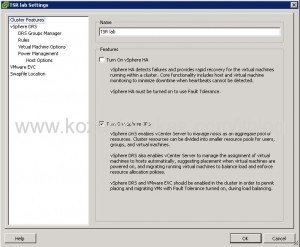
To create resource pool you need to have Distributed Resources Scheduler (DRS) enabled on the Cluster.

  1. Right Click on the Cluster and select Edit Settings…
  2. Tick Turn On vSphere DRS click OK.
    2
  3. Now you can create Resource Pools for this Cluster
    3

UCS: UCS Manager not accessible, (SWITCHOVER IN PROGRESS) (mgmt services state: INVALID) (HA NOT READY)


14 Jun

UCSM is not accessible when login into UCS cli and running show cluster extended-state command you receive the following:

ucs01-B# show cluster extended-state
Cluster Id: 0xe123456789123456-0xac12345678987456

Start time: Mon Apr 8 00:00:16 2013
Last election time: Tue Apr 22 18:50:00 2013

B: UP, SUBORDINATE, (Management services: SWITCHOVER IN PROGRESS)
A: UP, PRIMARY, (Management services: SWITCHOVER IN PROGRESS)

B: memb state UP, lead state SUBORDINATE, mgmt services state: INVALID
A: memb state UP, lead state PRIMARY, mgmt services state: INVALID
heartbeat state PRIMARY_OK

INTERNAL NETWORK INTERFACES:
eth1, UP
eth2, UP

HA NOT READY
Management services: switchover in progress on local Fabric Interconnect
Detailed state of the device selected for HA storage:
Chassis 1, serial: FOX12345678, state: active
Chassis 2, serial: FOX12345678, state: active

As we can see from the error the switchover is in progress but management services are not running on any of the FI’s so switchover cannot complete and this is the reason why you cannot access UCS Manager.
The blades running on this UCS infrastructure are not affected and should be running fine.

To fix the problem you need to reboot both Fabric Interconnects, one Fabric Interconnect at a time.

  1. SSH to one of the Fabric Interconnects and type:
    connect local-mgmt
    reboot
  2. Wait until the fabric interconnect reboots it can take 20-30 minutes.
  3. Once it rebooted you should be able to open UCSM
  4. In UCSM verify that the fabric that was rebooted has fully came up
  5. SSH to the second Fabric Interconnect and reboot it
  6. After Fabric Interconnect is up, SSH to UCSM IP and run:
    show cluster extended-state
  7. Verify that the cluster is in good state.

UCS: How to change ring buffer size and queues for adapters in UCS


14 Jun

Here is the thing that you’ll probably never do but just in case you need to change ring buffer size you’ll know how to do this in Cisco UCS. 🙂
Before you make changes you should really know what and why you doing this as this is the last thing I would change as the default setting should work fine.

  1. Login to UCSM
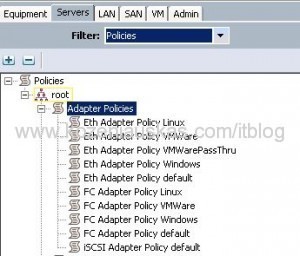
  2. Select Servers tab an change Filter to Policies
  3. Expand Adapter Policies you should see all the default adapter policies for Fibre, Ethernet and iSCSI
    1
  4. Do not change these as they might be used by multiple servers. Create new policy.
  5. To create new policy right click on Adapter Policies and select the policy type Fibre, Ethernet or iSCSI
    2
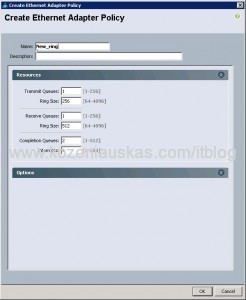
  6. Enter policy Name and if you need you can also enter Description.
    Enter the required Queue and Ring Size values and click OK.
    3
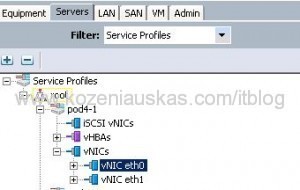
  7. To apply the new policy to the adapter change the Filter to Service Profiles.
  8. Select service profile and the adapter the you want this policy to apply to.
    4
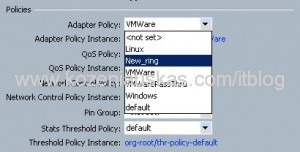
  9. On the right side change the Adapter Policy to a new one.
    5
  10. Click Save Changes

IT Blog

Just another blog on Kozeniauskas.com Network