Archive for the ‘Nexus’ Category

Nexus: %VMS-1-CONN_SSL_NOAUTH: SSL AUTHENTICATION after upgrading Nexus 1000v


16 Jun

After upgrading Nexus 1000V VSM to version 4.2(1)SV2(2.1a) you start recieving ‘%VMS-1-CONN_SSL_NOAUTH1: SSL AUTHENTICATION failure.‘ message in the console every couple minutes:

N1Kv# 2014 Jun 1 18:34:48 N1Kv %VMS-1-CONN_SSL_NOAUTH: SSL AUTHENTICATION failure.
2014 Jun 1 18:37:48 N1Kv %VMS-1-CONN_SSL_NOAUTH1: SSL AUTHENTICATION failure.
2014 Jun 1 18:40:48 N1Kv %VMS-1-CONN_SSL_NOAUTH: SSL AUTHENTICATION failure.
2014 Jun 1 18:43:47 N1Kv %VMS-1-CONN_SSL_NOAUTH1: SSL AUTHENTICATION failure.
2014 Jun 1 18:46:47 N1Kv %VMS-1-CONN_SSL_NOAUTH: SSL AUTHENTICATION failure.

This is expected behavior because of a new feature that was added in Nexus 1000v 4.2(1)SV2(2.1a) version:
vCenter Server Certificate Validation
The Cisco Nexus 1000V VSM can validate the certificate presented by vCenter Server to authenticate it. The certificate may be self-signed or signed by a Certificate Authority (CA). The validation is done each time the VSM connects to the vCenter Server. If the certificate authentication fails, a warning is generated but the connection is not impaired. This is an optional feature.

To get rid of the warning please generate a valid SSL certificate for vCenter server.

Nexus: Pre-upgrade check failed. Return code 0x40930062 (free space in the filesystem is below threshold).


16 Jun

While trying to upgrade Nexus 5000 series switch I ran into following issue:

Pre-upgrade check failed. Return code 0x40930062 (free space in the filesystem is below threshold).

Pre-upgrade check failed. Return code 0x40930062 (free space in the filesystem is below threshold).

Switch has enough free:

Enough free space

Enough free space

Look at install logs to identify where the problem is by typing:
show system internal log install details | include space

show system internal log install details | include space

show system internal log install details | include space

As you can see the problem is because /var/tmp is bellow the threshold.
To identify what is  taking space in /var/tmp type:
show system internal dir /var/tmp (more…)

Configuring NTP and Timezones on Cisco devices(UCS, MDS, Nexus, Catalyst) in Vblock


21 Jun

Cisco UCS

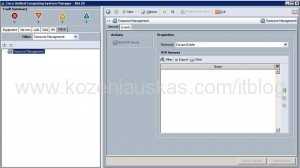
  1. Open UCS manager.
  2. Select Admin tab and change filter to Timezone Management
  3. Select your timezone and click on green + to add NTP server details
    1
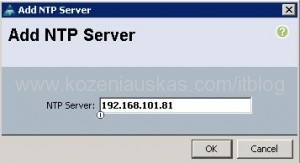
  4. Enter IP address of your NTP server and click OK. You can add FQDN of the server but then make sure that DNS is configured in UCS Manager.
    2

Cisco Nexus 5000 and 7000

  1. Login using CLI to your Nexus switch
  2. To configure your timezone and NTP server details:
    conf t
    clock timezone UTC 0 0
       <== Change your name of timezone from UTC. First 0 is for Hours offset and the second is for minutes offset
    ntp server 192.168.101.81 use-vrf management
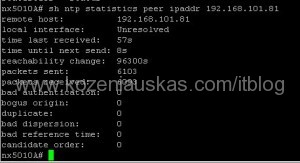
  3. Verify that the configuration was set and packet are being received:sh ntp statistics peer ipaddr 192.168.101.81
    7
    sh clock

Cisco Nexus 1000v and MDS switchesLogin to CLI to your Nexus switch

  1. Login using CLI to your MDS or 1000v switch
  2. Configure timezone and NTP server details:
    conf t
    clock timezone UTC 0 0    
    <== Change your name of timezone from UTC. First 0 is for Hours offset and the second is for minutes offset
    ntp server 192.168.101.81
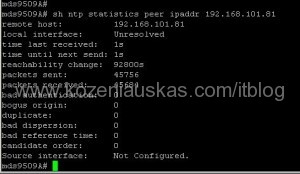
  3. Verify that the configuration was set and packet are being received:sh ntp statistics peer ipaddr 192.168.101.81
    5
    sh clock

Cisco Catalyst switches

  1. Login using CLI to your Catalyst switch
  2. Configure timezone and NTP server details:
    conf t
    clock timezone UTC 0 0    
    <== Change your name of timezone from UTC. First 0 is for Hours offset and the second is for minutes offset
    ntp server 192.168.101.81
  3. Verify that the configuration was set and packet are being received:
    sh ntp status
    4
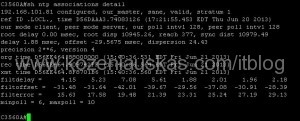
    sh ntp associations detail
    6
    sh clock

Beware that it may take some time for clock to synchronize on all devices.
If you are using Microsoft Windows w32tm service for NTP then on your NTP server you need to change LocalClockDispersion to 0 seconds or Cisco devices will not sync.
To check the current setting:

  1. open command prompt on NTP server
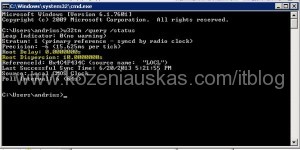
  2. type:w32tm /query /status
    8
    By default Dispersion is set to 10 seconds. It cannot be more than 1 second for Cisco devices to sync
  3. Open registry and find the following key
    HKEY_LOCAL_MACHINE\SYSTEM\CurrentControlSet\services\W32Time\Config
  4. Change the value of LocalClockDispersion from a to 0
  5. Restart Windows Time service
  6. The devices should start syncing.

Nexus: Upgrading Cisco Nexus 5000


06 Mar

So here is how to upgrade Nexus 5000 series switch. In this instance I have 2 Nexus 5010 switches in vPC configuration as they are part of the Vblock. I will be upgrading them from 5.1(3)N1(1a) to 5.2(1)N1(1)
First of all, although upgrade procedure is pretty much the same, please always check with Cisco for latest upgrade guides:
http://www.cisco.com/en/US/products/ps9670/prod_installation_guides_list.html

For the upgrade to be done as quick as possible it is important to do some work before it, like downloading the files from Cisco, uploading them to switches and running checks.

  1. Download Kickstart and System files from Cisco.com
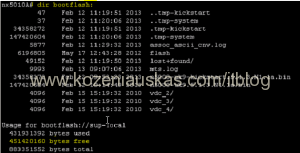
  2. Verify that you have enough space on the switch
    dir bootflash:
    030613_2025_NexusUpgrad1.png
  3. Upload both files to the switch. In this case I used TFTP server:
    copy tftp://x.x.x.x/kickstart_or_system.bin bootflash:            <=== replace x.x.x.x with TFTP server IP, kickstart_or_system.bin with your Kickstart or System file name.
    type management when asked to Enter vrf
    030613_2025_NexusUpgrad2.png
    Note: In Vblock upload files to both switches. Copy operation might take some time.
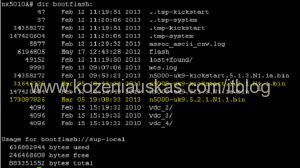
  4. Once both Kickstart and System files are uploaded verify that the file size of both files is correct.
    dir bootflash:
    030613_2025_NexusUpgrad3.png
  5. Now we need to run some pre upgrade checks which will show if there any problem that should be fixed before the upgrade can be started
    show compatibility system bootflash:system.bin            <=== replace system.bin with your System file name.
    You should get No incompatible configurations message
    030613_2025_NexusUpgrad4.png
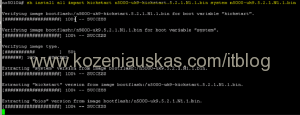
  6. Next we to see the impact of the upgrade:
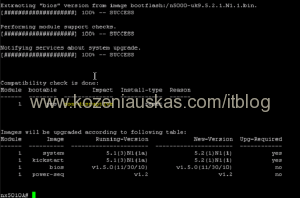
    show install all impact kickstart kickstart.bin system system.bin        <=== replace kickstart.bin and system.bin with your Kickstart and System file names.
    This procedure might look like a real upgrade but it only does all the checking
    030613_2025_NexusUpgrad5.png
    It will take some time to complete. It must succeed at all steps and should show that upgrade is non-disruptive
    030613_2025_NexusUpgrad6.png
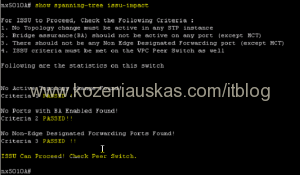
  7. Now check spanning-tree impact. Everything should pass
    show spanning-tree issu-impact
    030613_2025_NexusUpgrad7.png
  8. Check lacp impact
    show lacp issue-impact
    030613_2025_NexusUpgrad8.png
  9. There is also show fex to verify that all fabric extenders are reachable but in the Vblock there are no extenders connected to the switches so this can be skipped.
  10. Once steps 1 – 9 are completed and all are OK you can proceed to upgrade.
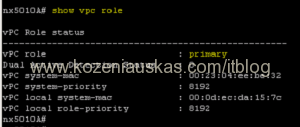
  11. Because this is Vblock and 2 switches are in vPC config you need to identify the primary one as the upgrade should be started from primary
    show vpc role
    030613_2025_NexusUpgrad9.png
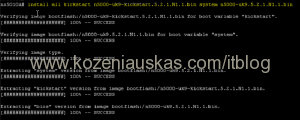
  12. Start upgrade
    install all kickstart kickstart.bin system system.bin        <=== replace kickstart.bin and system.bin with your Kickstart and System file names.
    030613_2025_NexusUpgrad10.png
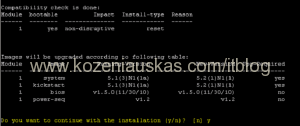
  13. Once prompted verify to continue by pressing y
    030613_2025_NexusUpgrad11.png
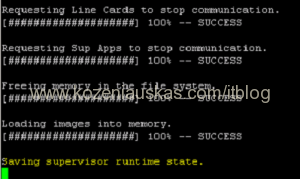
  14. The upgrade will begin.
    If you connected to switch remotely over SSH, you will lose connectivity after seeing Saving supervisor runtime state
    message as the switch is rebooting. This should take about 5 minutes. Ping it to find out when it is back online.
    030613_2025_NexusUpgrad12.png
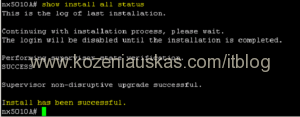
  15. Login to the switch and check upgrade status. If upgrade went ok you should see that it was successful.
    show install all status
    030613_2025_NexusUpgrad13.png
  16. Verify version
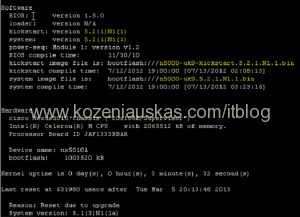
    show version
    030613_2025_NexusUpgrad14.png
  17. Verify that everything is working as expected.
    Upgrade is complete
  18. In Vblock once you’ve verified that primary switch is working fine, upgrade the secondary switch.

IT Blog

Just another blog on Kozeniauskas.com Network