So lets say you’ve accidentally delete one or both Boot images from OSD in Configuration manager console and want to add them back.
When you delete the image in the console the default image file is still located on the SCCM server.
So here are the steps to add Boot image back:
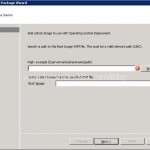
1. Open Configuration manager console. Navigate to Site Database>Computer Management>Operating System Deployment>Boot images. Click on Add Boot Image
Add Boot Image Package Wizard will start

2. In the path field you need to enter the path where WIM boot image file is located. The location of the file should be:
\\SCCMserverName\sms_SiteCode\OSC\boot\platform\boot.wim
So if you server name is dubsccm, site code is MET and you want to add image for x86(32bit) platform your file location should look like this:
\\dubsccm\sms_met\OSD\boot\i386\boot.wim
Once you enter the path the Boot Image field should come up automatically.

3. Enter the name, version and comment if you need them.

4. In the sumary page click next and after the progress is finished click Close.

5. Now you have your Boot image but you need to assign the drivers to it as without them most likely you will not be able to OSD many machines.
Right click on the image that you’ve created and select properties.

6. Select Windows PE tab. Click on Yellow flower button. This will open a list of drivers available. Select the one you need and click OK. Unfortunately you cannot select multiple drivers so you’ll have to do them one by one. Other option would be to create a drivers package with multiple drivers and apply it to the Boot image.

7. Now you have to assign PXE Distribution point to you newly created Boot image. You could have assigned it straigh away, but after adding drivers it would need to be refreshed so better to add drivers first and then add distribution point. The steps are shown bellow.

So your newly added Boot image is ready for use.
If the boot image that was deleted was already used for Task sequences then you will need to modify your task sequence to point to new Boot image. This is because after the boot image is deleted all the associated Task Sequences are modified and ‘Use a boot image‘ option is disabled.
To point the task sequence to boot image just Right click on the task sequence and choose properties. Select Advanced tab. In there tick on ‘Use a boot image‘ and click on browse. Select the boot image and click OK. Click OK again in the task sequence properties window.

Tags: Adding deleted Boot image, Boot.wim, SCCM, winpe


